New Functionality in Sage Intacct 2020R4 Impacts Vendor Records
If you use Sage Intacct to prepare your 1099s, new functionality in 2020R4 may impact your vendor records.
Sage Intacct is updating its functionality due to an Internal Revenue Service (IRS) rule change regarding 1099 forms. The new IRS rule provides that all non-employee compensation previously reported on Form 1099-MISC in Box 7 should now be reported on Form 1099-NEC in Box 1. For additional information on this reporting requirement, please contact your tax advisor.
The new functionality is included in 2020R4, which will be deployed to all customers Friday evening, November 13 (Pacific time). Once it is released, you may receive an error when attempting to post a bill from certain vendors. To avoid this, Sage Intacct recommends that you update all Vendor records that have a configuration setting of Form 1099-MISC, box 7 by November 13, 2020.
Here are the steps you should take to update your vendor records.
Step 1: Run the 1099 Report to show all current 1099 activity per vendor.
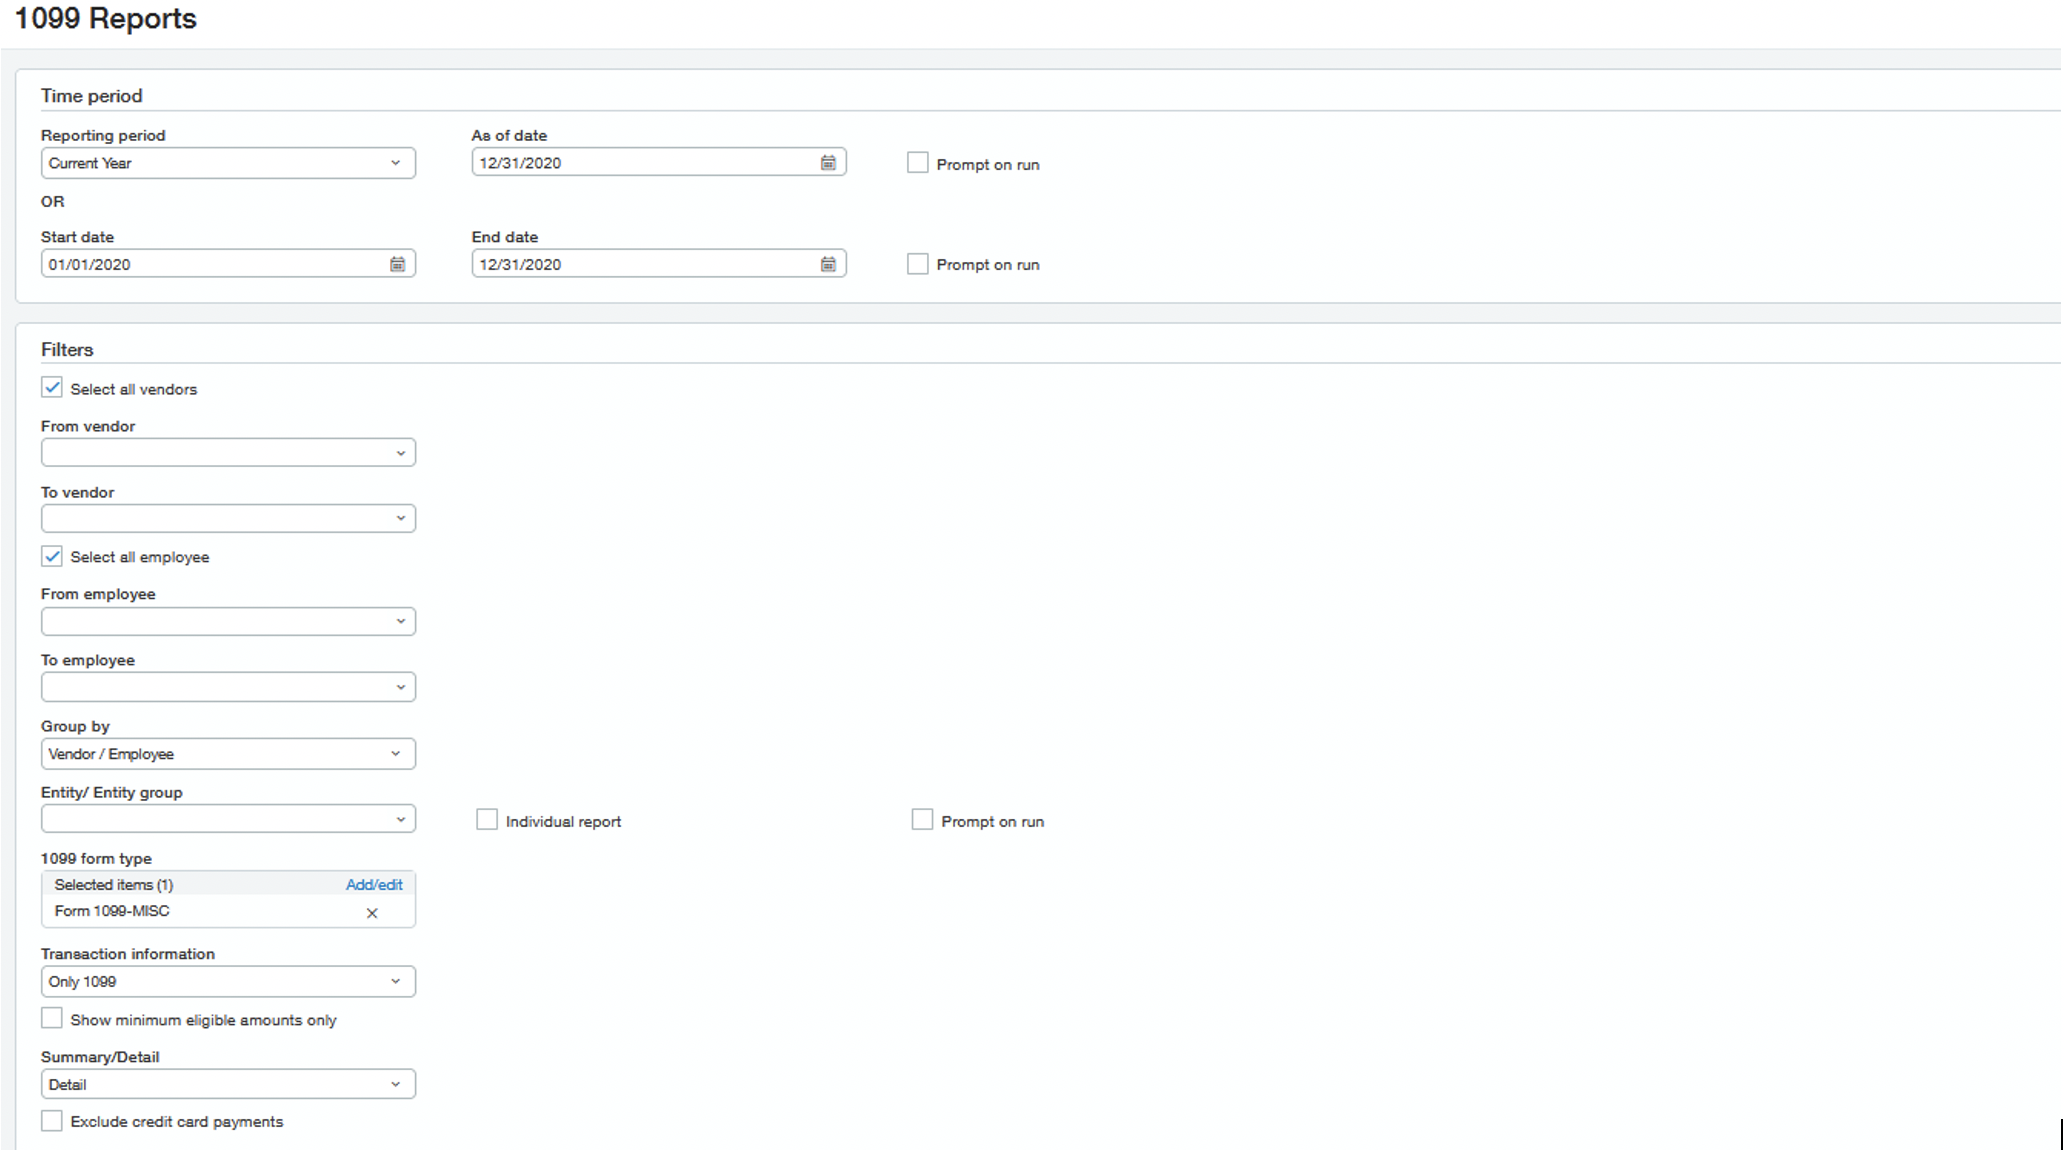
- Navigate to: Accounts Payable > All tab > 1096/1099 > 1099 Reports.
- Set the filters as shown in the screenshot below.
- Print or save this report and use it to reconcile balances after completing the following steps.
Step 2: Identify all 1099 Vendors that need to be edited in your system.
- Navigate to: Accounts Payable > All tab > Vendors.
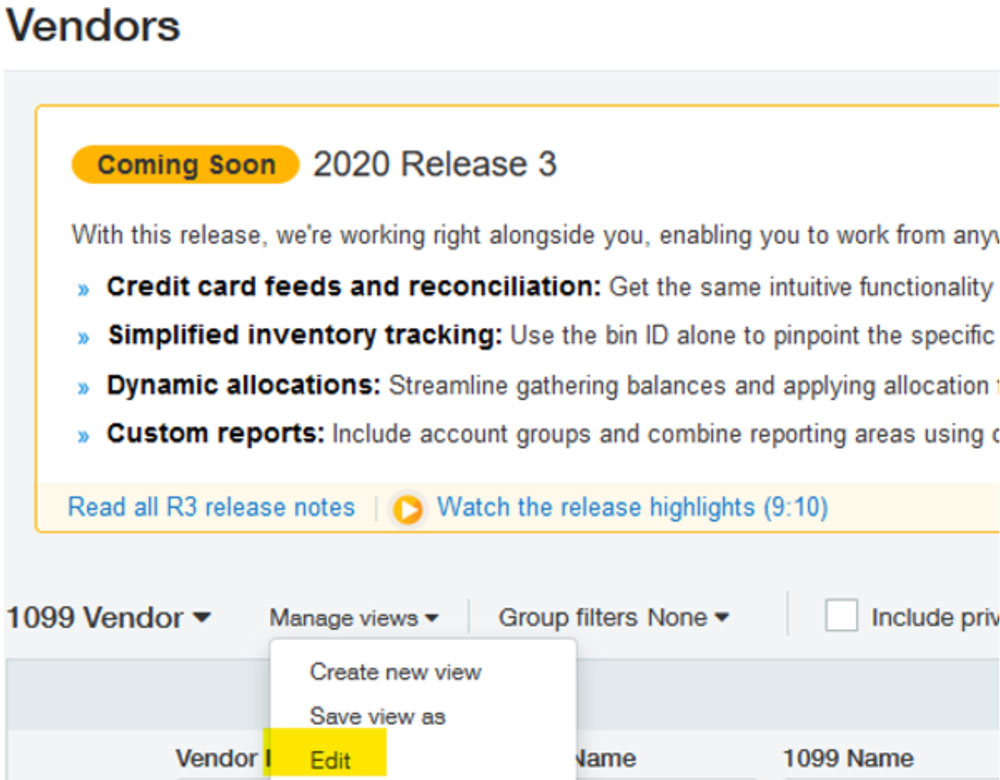
- Click the Manage Views dropdown and click Create New View.

- In the first step of the Wizard, select the fields as shown below.
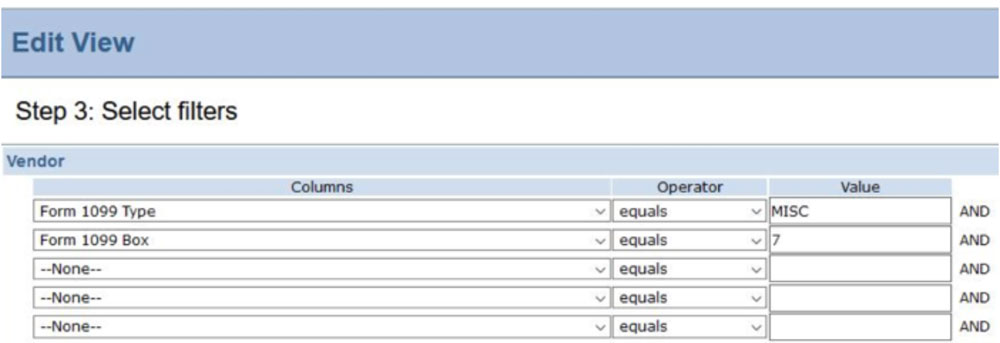
- In the third step of the Wizard, create the filter shown below.

- In the final step of the Wizard, give your view a descriptive name and click save. Then select the new view in the dropdown menu on the top left of the vendor list screen.
Step 3: For vendors posting to a single 1099 vendor type of 1099-MISC, box 7, update the records using one of these options.
Option 1: Manually update each Vendor record
- Click edit on each vendor record.
- Click on the Additional Information tab.
- Click on the blue Form 1099 link.
- Change the Form Name to Form 1099-NEC and change the Default 1099 Box to 1.
- Click Save to exit the 1099 Setup.
- Click Save to exit the Vendor Setup.
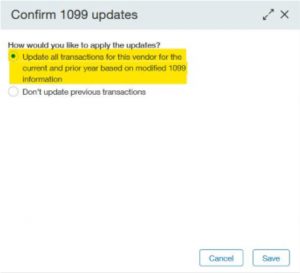
- When you click Save, the following screen will appear. Select the option highlighted below, then click Save.

Option 2: Use the transaction update import template to edit the vendor record settings.
- Navigate to Company > Setup > Import Data.
- Click on the template link for Vendor 1099 Transaction Update to download the spreadsheet template.
- Complete the template for all vendors with a default 1099 setting of Form 1099-MISC, box 7. (Use the view created in Step 2 above to identify these vendors.)
- Recommended columns to include in the template are:
- VendorID
- Default 1099 Type
- Default 1099 box
- UpdateTrans
- FromDate
- ToDate
- Save the completed template in CSV format.
- Navigate to Company > Setup > Import Data.
- Click on the import link for Vendor 1099 Transaction Update to import the spreadsheet template.
Step 4: Update vendors posting to multiple 1099 vendor types.
In the rare situation where you have vendors that are posting to multiple 1099 vendor types (for example, 1099-MISC box 7 and 1099-MISC box 1), contact Cargas for support by emailing customercare@cargas.com.
Step 5: Reconcile balances.
Use the 1099 report from Step 1 to reconcile balances.
Need Help?
If you have questions about this new functionality or are experiencing problems making these updates contact us! Our expert team of Sage Intacct consultants is on standby to answer your questions and guide you through the process.

